Anime Arm Drawing: Fix Tube-Like Arms and Improve Volume
Anime Arm Drawing: Refine Anatomy, Volume, and Elbows
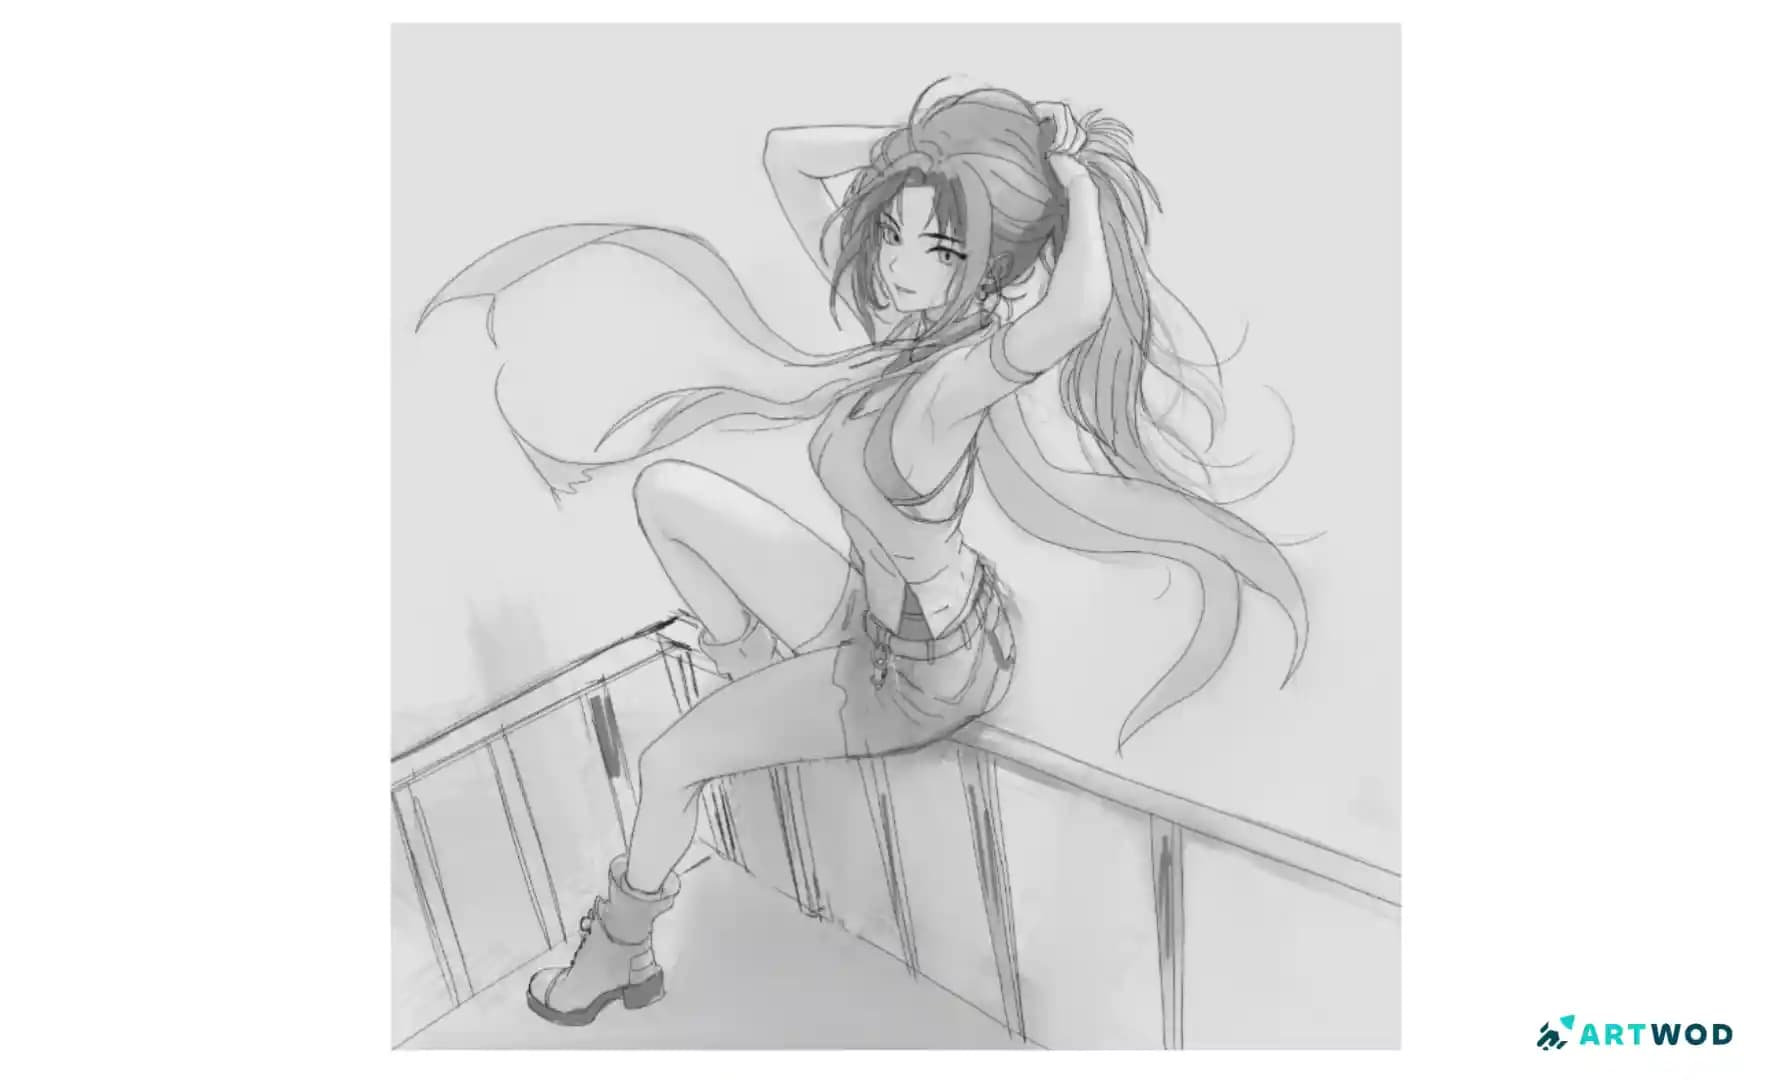
Artist @luismartinezv shared an anime figure sketch on the Artwod Community while working on a dynamic seated pose. The artist's main concern was that the arms kept looking like straight tubes, especially around the elbows. Since the drawing already has a strong pose, the feedback focuses on making the arm anatomy feel more three-dimensional without losing the simplicity of anime-style drawing.
Insights shared in this blog post are by: @gabrielle34427. You can also request feedback on your artwork in Artwod’s Art Community.
The Feedback Request: Why Do the Arms Look Like Tubes?
In the Artwod submission, @luismartinezv explained:
"I’m trying to sketch an anime girl and the arms always look like straight tubes. I struggle with anatomy and volume, especially around the elbow. Using photoshop right now, any feedback on what i should fix?"
That is a very useful problem to isolate because the drawing itself has plenty of movement.
The character is seated on a railing with one arm raised behind the head and the other reaching upward toward the hair. The pose creates several bends and overlapping forms, giving the arms an important role in the overall figure.
The challenge is making those arms feel like three-dimensional limbs that bend through joints, rather than long cylindrical shapes attached to the shoulders.
The good news is that this does not require making the drawing much more complicated. A simpler construction approach can actually make the arms easier to understand.
Think of the Arm as Connected Formsr
One reason an anime arm can look like a tube is that the entire limb is drawn as one continuous shape.
Instead, break it into a few connected volumes:
Upper arm
Elbow
Forearm
Wrist and hand
You do not need to draw detailed anatomy at this stage. Simple cylinders, tapered forms, and joint shapes are enough to establish the volume.
The important part is that these forms should not all have exactly the same thickness.
The upper arm and forearm can change in width as they approach the elbow and wrist. Those changes give the limb a more organic structure.
This feedback submission of a male subject just out the shower shows how a lack of connected forms can make the pose look stiff. In the paintover, the arms are far more defined in the details and triceps muscles and are better connected to the back muscles. Additionally, it better shows the taper from the elbow down to the wrist. I personally find this can all be shown by making sure the sketch reflects the forms of the muscles and skeletal structure in the arm.
Pay Special Attention to the Elbow
@luismartinezv specifically mentioned struggling with volume around the elbow, and that is one of the most important areas to practice.
The elbow is not simply a bend in a tube.
It is a joint where the upper arm and forearm meet, creating a change in direction and surface structure. When the arm bends, the outside and inside of the joint do not behave identically.
For a simplified anime drawing, you can think of the elbow as a transition point between two volumes.
Try drawing the upper arm as a tapered cylinder and the forearm as another tapered cylinder. Then connect them at the elbow.
This gives you a much clearer construction than drawing one long curved outline.
We can see a strong example of this where the elbow is drawn in the paintover. The arm can look unnatural or doll-like without defining the shape of the elbow. It’s important to remember the elbow is the humerus and ulna bones showing through, keeping that in mind we can structure the elbow around that.
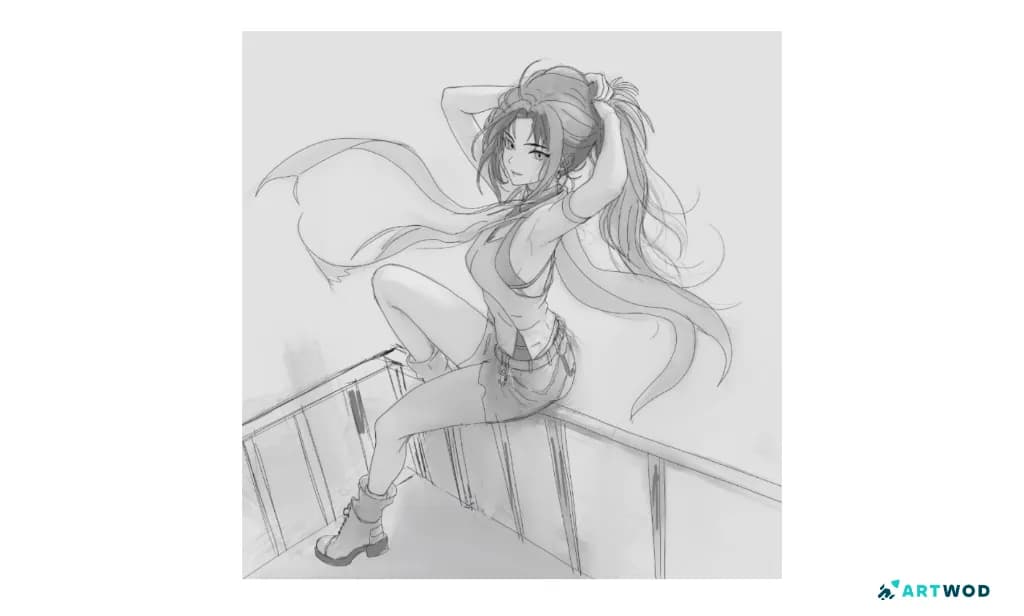
Anime arm anatomy feedback image showing the character's raised arms and elbow areas for volume and structure
Use the Pose to Show Volume
The pose in @luismartinezv's drawing is dynamic, which gives you a useful opportunity to practice volume.
One arm is raised behind the head while the other reaches upward. Because the limbs are bent and positioned differently, their forms should also change according to perspective and orientation.
A useful question to ask while drawing is:
Which part of this arm is coming toward me, and which part is moving away?
That question can help prevent the limb from looking completely flat.
A forearm pointing more toward the viewer may appear broader, while a section moving away can appear narrower. You do not need to exaggerate this dramatically, but acknowledging the perspective can make the arm feel much more dimensional.
One other factor to consider is the angle, as that will also result in inconsistent arms, such as in this paintover due to perspective foreshortening. Due to the angle of the original piece, we would likely see this a little bit on the right arm in the back. In order to do this yourself, I would want to establish the object in space by establishing the perspective it follows first. There is a lesson on extreme foreshortening in the intermediate drawing course.
Avoid Making Both Sides of the Arm Identical
Another useful way to escape the "tube" problem is to stop thinking of the arm as two parallel contour lines.
The inner and outer contours should respond to the anatomy and the pose.
For example, around a bent elbow, one side can create a tighter transition while the opposite side forms a broader curve. Near the wrist, the arm can narrow before transitioning into the hand.
Additionally, the upper arms taper as they meet the bend in the knee. They’re more akin to a tube that is larger on one end, then carrying the same girth along it.
This creates variation along the length of the limb.
When both sides of an arm remain almost perfectly parallel from shoulder to wrist, the result tends to look mechanical.
Start With Simple Construction Before Anatomy
If you are still learning anime anatomy, it can be tempting to draw the finished contour immediately.
Instead, try a construction pass first.
A simple workflow is:
Mark the shoulder position.
Draw a simple volume for the upper arm.
Place the elbow as a clear joint.
Construct the forearm as another tapered volume.
Add the wrist and hand.
Check the direction and perspective of the entire limb.
Only then refine the outer contour and anatomy.
This approach makes mistakes easier to spot.
If the construction looks wrong, you can fix the arm before spending time on clean linework.
Practice Arms in Different Positions
For the specific problem @luismartinezv is working through, repeating the same neutral arm pose may not be enough.
Practice the arm in several positions:
Straight down
Bent at roughly 90 degrees
Raised above the head
Reaching toward the viewer
Bent backward
Partially hidden behind the head
For each pose, build the arm from the same basic components. We can find many references to arms online to help us. In the intermediate drawing course, you can find an intuitive perspective section which allows you to create shapes you could use for the arms. I find that breaking down the arms into cylinders that change in shape can help with understanding how to draw them in a 3D space.
The goal is to understand how the volumes connect when the limb changes direction.
This is much more useful than memorizing a single "anime arm shape."
Common Mistakes When Drawing Anime Arms
A few habits can make anime arms look flat or tube-like:
Drawing the entire arm as one continuous cylinder
Keeping the upper arm and forearm the same thickness
Treating the elbow as only a sharp bend
Drawing both contours as parallel lines
Ignoring perspective when the arm moves toward or away from the viewer
Refining the outline before checking the underlying construction
Adding anatomical details without first establishing volume
If an arm looks like a tube, go back to the construction rather than simply adding more anatomical lines.
What Other Artists Can Learn From This Drawing
Build the arm from connected forms. Upper arm, elbow, and forearm should read as related volumes.
Treat the elbow as a joint. It is a transition between forms, not simply a bend in a cylinder.
Use perspective to create volume. Arm thickness can change depending on how the limb is oriented.
Construction comes before clean contours. Simple forms make anatomical problems easier to identify.
Practice varied poses. Understanding the arm in different positions is more transferable than memorizing one stylized shape.
These principles are useful for anime figure drawing as well as more realistic anatomy studies.
How Community Feedback Can Help With Anime Anatomy
Anatomy problems can be surprisingly difficult to diagnose from your own sketch. You may know that an arm looks "wrong" without being able to tell whether the problem is the elbow, proportions, perspective, or overall volume.
That is exactly what makes @luismartinezv's question useful. The artist identifies the specific recurring problem—arms looking like tubes—and also points to the elbow and volume as areas where they are struggling.
When sharing an anime anatomy drawing for feedback, explaining the specific part that feels wrong gives fellow artists a much clearer starting point.
Instead of simply asking whether the arm looks good, you can ask whether the elbow construction works, whether the limb has enough volume, or whether the perspective reads correctly.
That focused feedback can make your next anatomy practice much more productive.
FAQs
Build the arm from separate connected forms for the upper arm, elbow, and forearm. Vary their thickness and make the contours respond to the joint and pose.
How do you draw an anime elbow?Think of the elbow as a joint connecting two volumes rather than a simple bend. Establish the upper arm and forearm first, then shape the transition between them.
Why do my anime arms look flat?The arm may be missing clear three-dimensional construction or perspective. Try using simple tapered cylinders and changing their size according to the limb's orientation.
How can I improve anime arm anatomy?Practice constructing the upper arm, elbow, forearm, wrist, and hand as connected forms. Repeat the exercise in different poses rather than relying on one standard arm shape.
Should I draw the outline or construction first?Construction should come first when you are learning anatomy. Once the underlying volumes and proportions work, refine the outer contour.
How do you add volume to an anime arm?Use tapered forms, changing widths, joint transitions, and perspective. The inner and outer contours should not remain perfectly parallel throughout the limb.
@luismartinezv's anime figure sketch shows why arm anatomy can feel difficult even when the overall pose is already working. The main issue is not necessarily a lack of detail; it is understanding the arm as a sequence of connected three-dimensional forms. Remember the arms are within a 3D space, and don’t have to be identical in shape or length if the angle differs between them.
If your anime arms keep looking like tubes, try simplifying them rather than adding more anatomy. Build the upper arm, elbow, and forearm separately, pay attention to how the joint bends, and let perspective change the apparent size of the forms. It’s almost important to remember what muscle groups the arm connects to in the back via the details, and how that will affect the appearance of the upper shoulder.
Once that construction starts making sense, the final contours become much easier to draw—and dynamic poses like this one become far less intimidating. The Artwod community is a community that allows artists to share artwork, get feedback from fellow artists and aids in learning. If you want to get feedback of your own, post your art in the anime category.