Drawing Facial Expressions: Capturing Emotion and Character in Portraits
Drawing Facial Expressions: Techniques for Emotion and Character
Every beginner hits the same wall. The face looks correct but feels empty. The proportions are right, the features are placed, and still - nothing. No personality, no emotion, no life.
The problem is that most tutorials teach you to draw faces. What they don't teach you is how to make them feel something.
This art-workout will fix that!
Step 1: Draw Five Core Expressions - Features Only
Before you worry about full faces, isolate the features. Draw neutral, happy, angry, surprised, and sad expressions, but don’t place them on the face yet.
This forces you to look at what each feature actually does. The eyebrows alone carry an enormous amount of emotional information. A raised inner corner reads as sadness or worry. A lowered outer edge reads as anger. Surprise pulls everything up and apart. Happiness lifts the cheeks and narrows the lower eyelid.
Work through each expression slowly. You're building a library of movements that you'll use for the rest of your drawing life. If you're having trouble, think about emoji when you do this. They are the perfect template!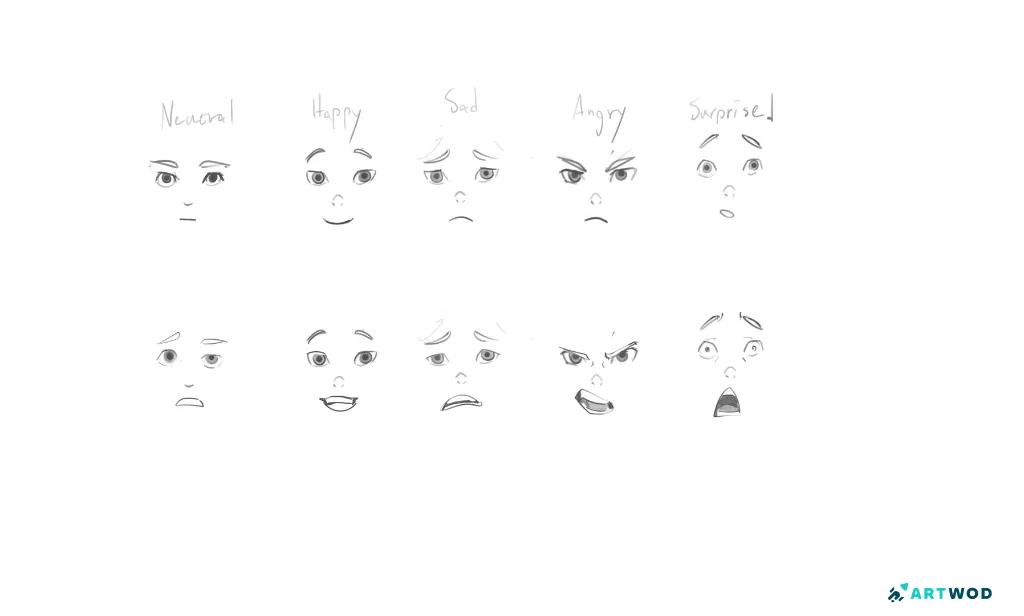
8 facial expressions, no head, just flat expressions: neutral, happy, sad, angry and surprised, 2 faces per expression, 2d, digital drawings black pen
Step 2: Draw Each Expression Again - This Time Exaggerate
Take every expression from step one and push it further than feels comfortable.
This is the step most artists skip, and it's the reason their expressions land flat. Subtle emotion is hard to read on a still image. What feels like a dramatic expression in your head often reads as mild on the page. Exaggeration is not a stylistic choice - it's a communication tool.
The angry brow you drew in step one? Lower it further. Compress it harder. The surprised eyes? Open them wider, raise the brows higher. Happy? Let the eyes close more, push the cheeks up further.
In this step you're finding the upper limit of each expression so you know how much range you actually have.
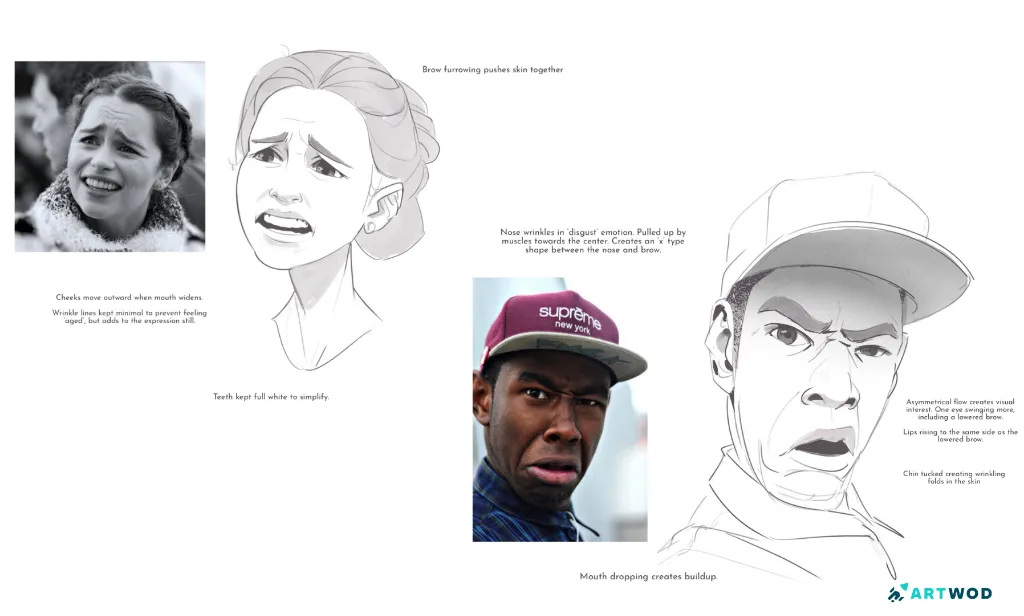
Step 3: Study 1-3 Emotions From Reference
Now bring in reference. Pick one to three emotions and find real photographs of people expressing them genuinely - we provided some below for your convenience!
Study what the reference is doing that your drawings aren't. Look at the areas you haven't drawn yet - the nose, the mouth, the jaw, the neck. Emotion moves through the whole face, not just the eyes. The mouth pulls differently for each expression. The jaw tightens with anger, drops with surprise, softens with sadness.
Draw from the reference slowly. You're not copying - you're extracting information.
Studies of expressions, Emilia Clarke, 2d, digital drawings black pen
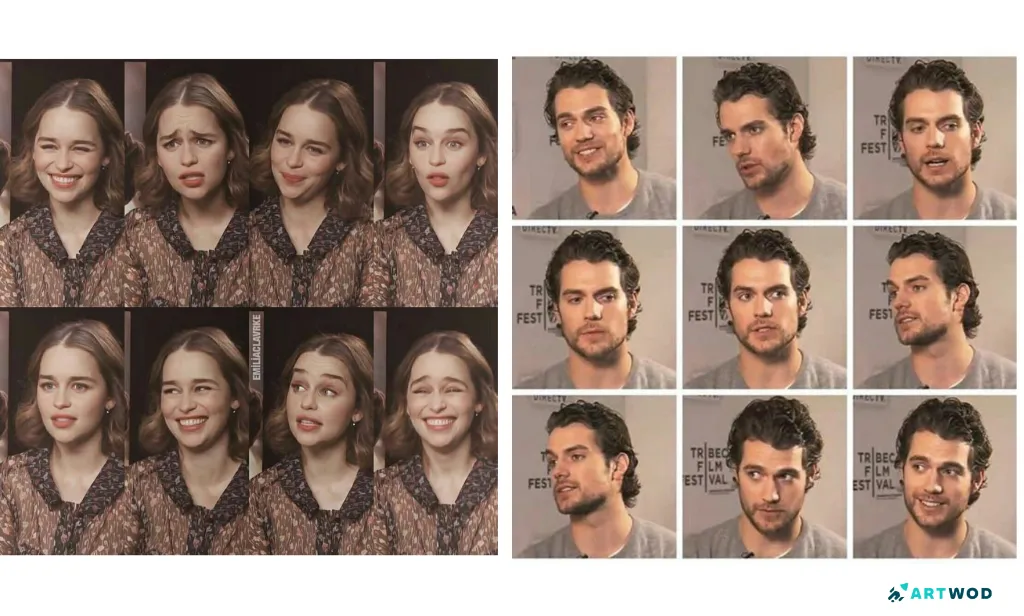
References of expressions from Emilia Clarke and Henry Cavill
Step 4: Wrap Your Expressions Around a Cylinder
This is where the work from the first three steps gets tested.
Draw a cut cylinder - a simplified head form - and place your expressions on its surface. This is the moment most artists realise their expressions only work facing forward. On a turned head, on a tilted face, on a three-quarter view, the features have to follow the form they're sitting on.
The eyes are no longer on a flat plane. They wrap around the cylinder. The distance between them changes with the angle. The eyebrows follow the curve of the brow ridge. Everything you drew in steps one and two now has to work in three dimensions.
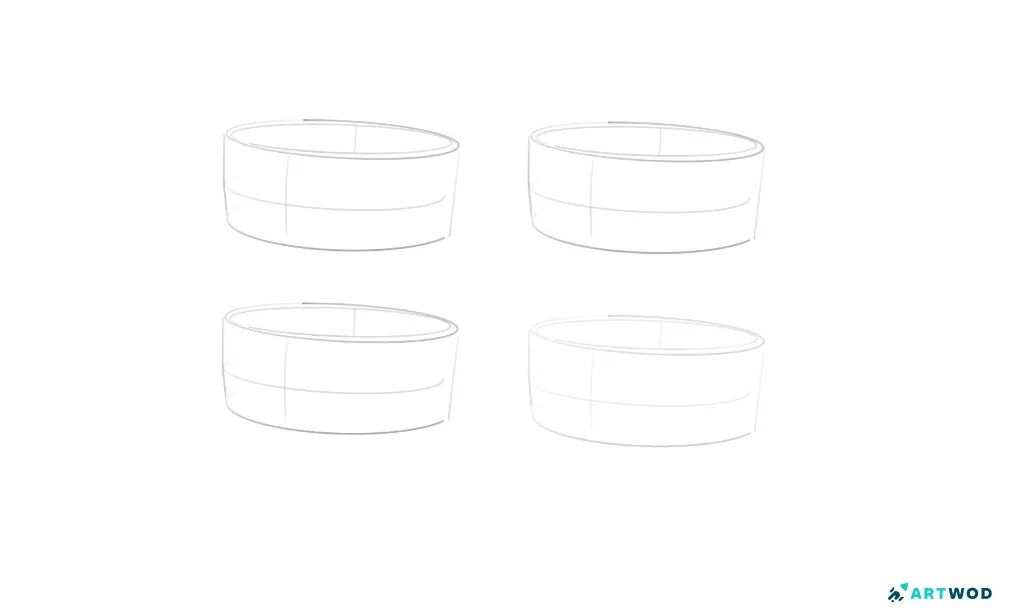
4 cut cylinders template, 2d, digital drawings black pen
Step 5: Add Noses and Mouths
Now the face is complete. Add noses and mouths to the expressions from step four.
The mouth is the second most expressive feature after the eyes, and the most commonly overdone. For anger, the lips press together or pull back - the jaw tightens underneath. For happiness, the corners pull up and back, the lower lip may drop slightly. For sadness, the corners pull down and the chin often crumples. For surprise, the jaw drops and the mouth opens - the lips go slack.
The nose is subtler but it moves too. Nostrils flare with anger and intense emotion. The nose itself doesn't move much, but the muscles around it do - and those muscles affect the upper lip and the area between the eyes.
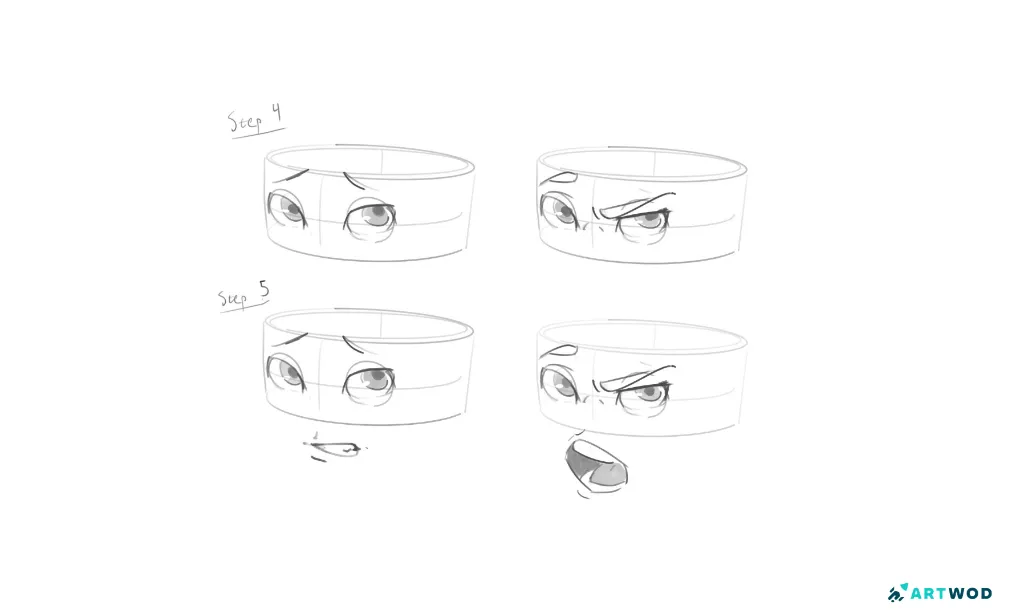
Expressions on 4 cut cylinders, 2 without a mouth, 2 with a mouth. 2d, digital drawings black pen
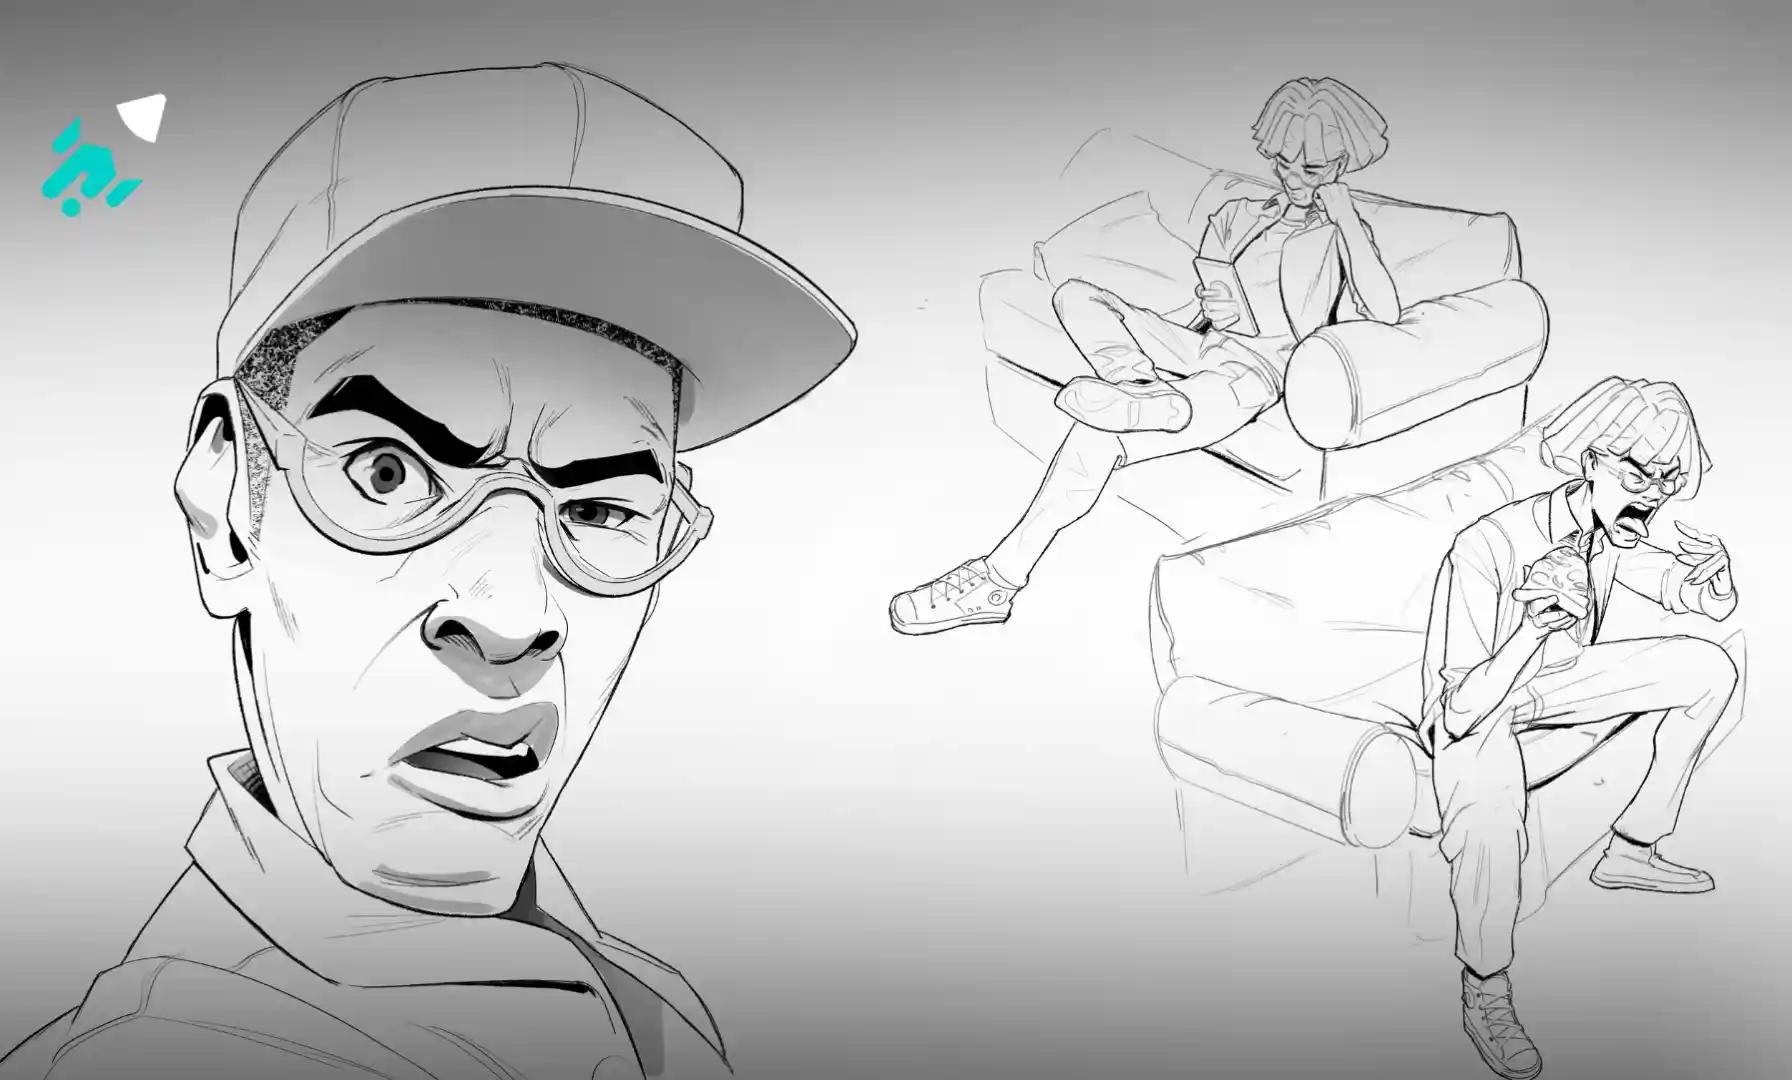
Step 6: Meet Joseph and Cassie
Joseph and Cassie both have neutral expressions right now. Your job is to change that.
Choose one of them and draw them - in a full pose - expressing either happy, sad, or angry. But here's what matters: Joseph has a hot temperament. His emotions come fast and hit hard. Cassie is pulled together - her emotions are controlled, contained, revealed in smaller movements.
The same emotion looks different on different people. A happy Joseph is loud and open. A happy Cassie is quieter, more internal. An angry Joseph is immediate. An angry Cassie is precise. Let the character inform the expression, not just the emotion.
This is where everything comes together - form, exaggeration, perspective, and character, all in one drawing.
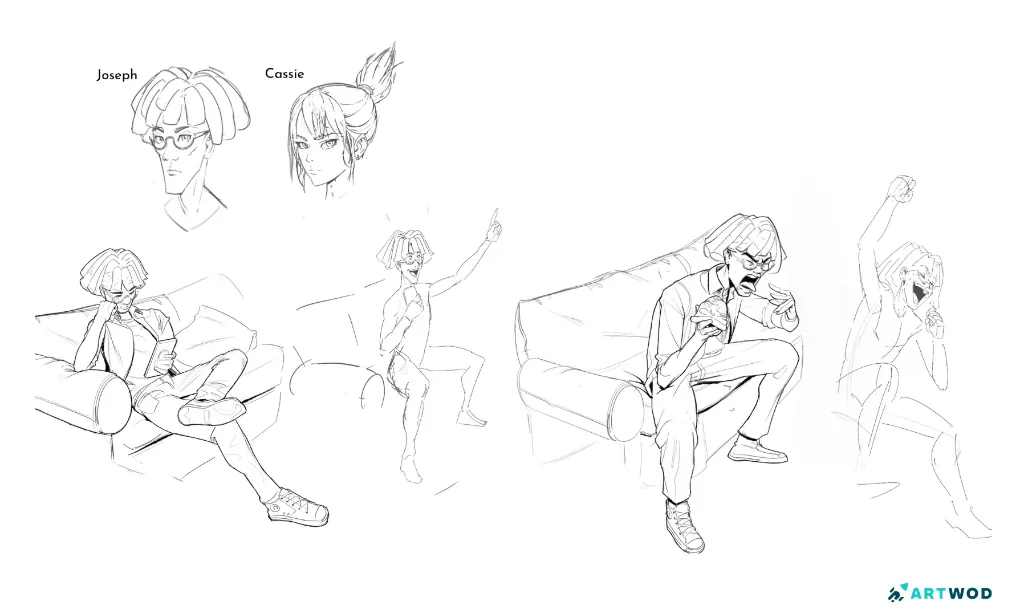
Joseph and Cassie Characters, their neutral faces for reference, then 4 drawings of Joseph with different expressions and poses. 2d, digital drawings black pen
Faces That Feel Like Someone
Expressions aren't decorations. They're the reason a character feels like a person rather than a drawing of one.
Work through these steps in order and don't rush step two - the exaggeration is where most of the learning happens. By the time you reach Joseph and Cassie, you'll have the tools to make them feel like real people with real inner lives.