How to Draw Hands Like a PRO: Tips & Tricks That REALLY Work
How to Draw Hands Like a PRO
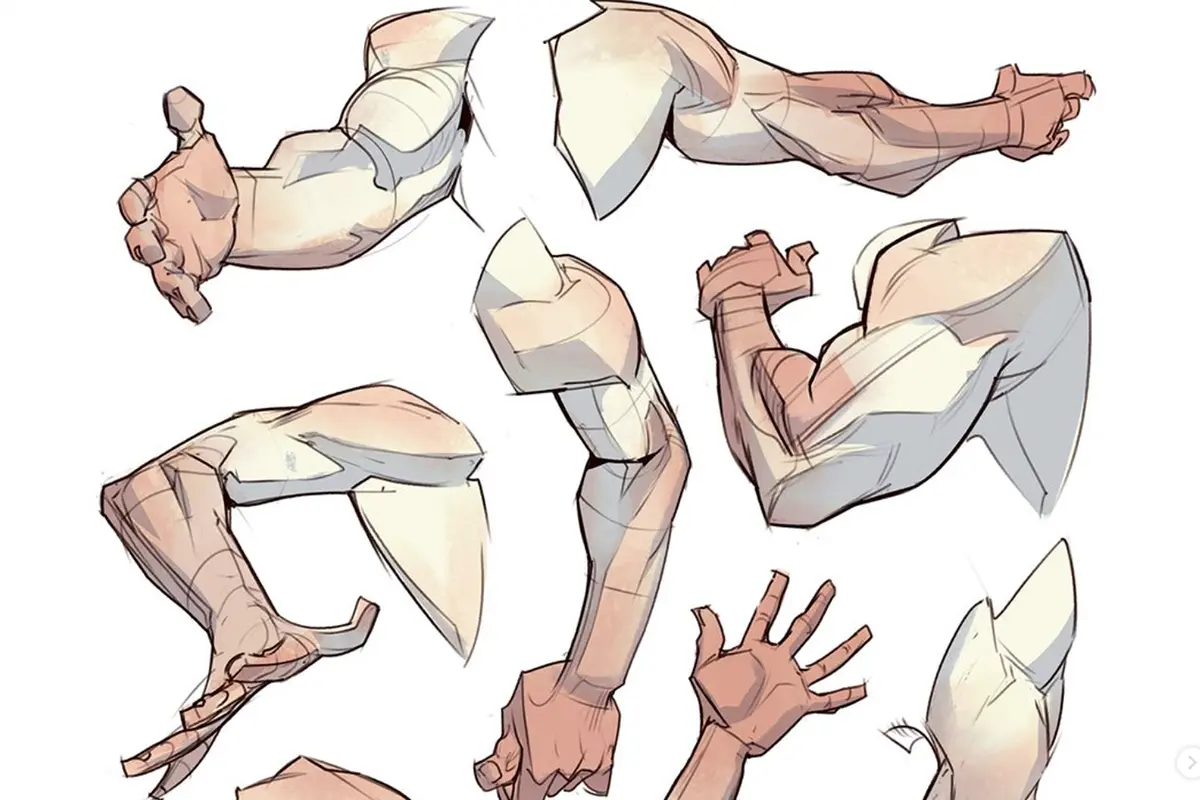
Prerequisite: Understanding Form Manipulation
Technique 1: The Mitten Principle
What it is:
Simplify the hand into a mitten shape by combining a manipulated box (for the palm) and a mitten-like form (for the fingers). Attach a sphere for the thumb base and a cylinder for the thumb itself.
Why it works:
This approach helps you see the hand as a single, expressive shape, making it easier to keep the gesture and avoid getting lost in finger details.
How to use it:
Start with the palm as a box.
Attach a mitten shape for the fingers.
Add a sphere and cylinder for the thumb.
For more dynamic hands, manipulate the mitten shape to show different gestures or separate out one finger (like the pinky or index) for added expression.

Pro tip:
Grouping fingers together keeps your drawing lively and avoids stiffness. Only separate fingers when you want to highlight a gesture.
Technique 2: The Bean (Beanie) Technique
What it is:
Divide the palm into three bean-like shapes: one for the pinky side, one for the thumb side, and one for the main padding of the palm.
Why it works:
This method helps you understand the 3D structure of the palm, especially in tricky angles or foreshortened views.
How to use it:
Sketch the three bean shapes to map out the palm.
Attach the thumb and fingers as simple forms.
Use this technique to draw hands from unusual perspectives or when the hand is turned away from you.
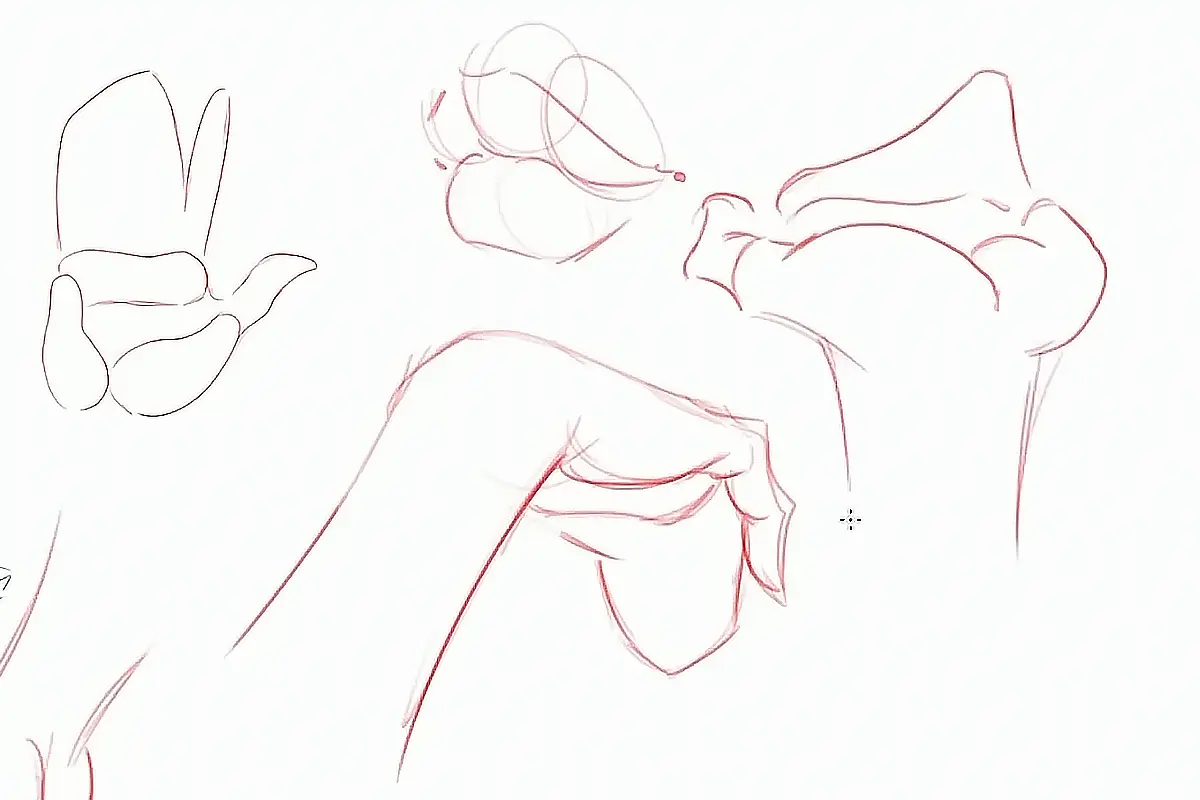
Pro tip:
The bean technique is especially helpful for drawing the inside of the hand and for understanding how the palm pads overlap in space.
Technique 3: Drawing Fingers on a Slope
What it is:
Instead of attaching fingers straight onto a flat palm, recognize that the base of the fingers sits on a sloped plane.
Why it works:
This subtle slope makes your hands look more natural and avoids the stiff, robotic look that comes from using only boxes and cylinders.
How to use it:
When drawing the palm from the side, show a gentle slope from the knuckles down to the webbing between the fingers.
Insert the cylinders of the fingers into this sloped plane, not a flat edge.
Pay attention to the webbing and padding at the base of the fingers for a more realistic look.
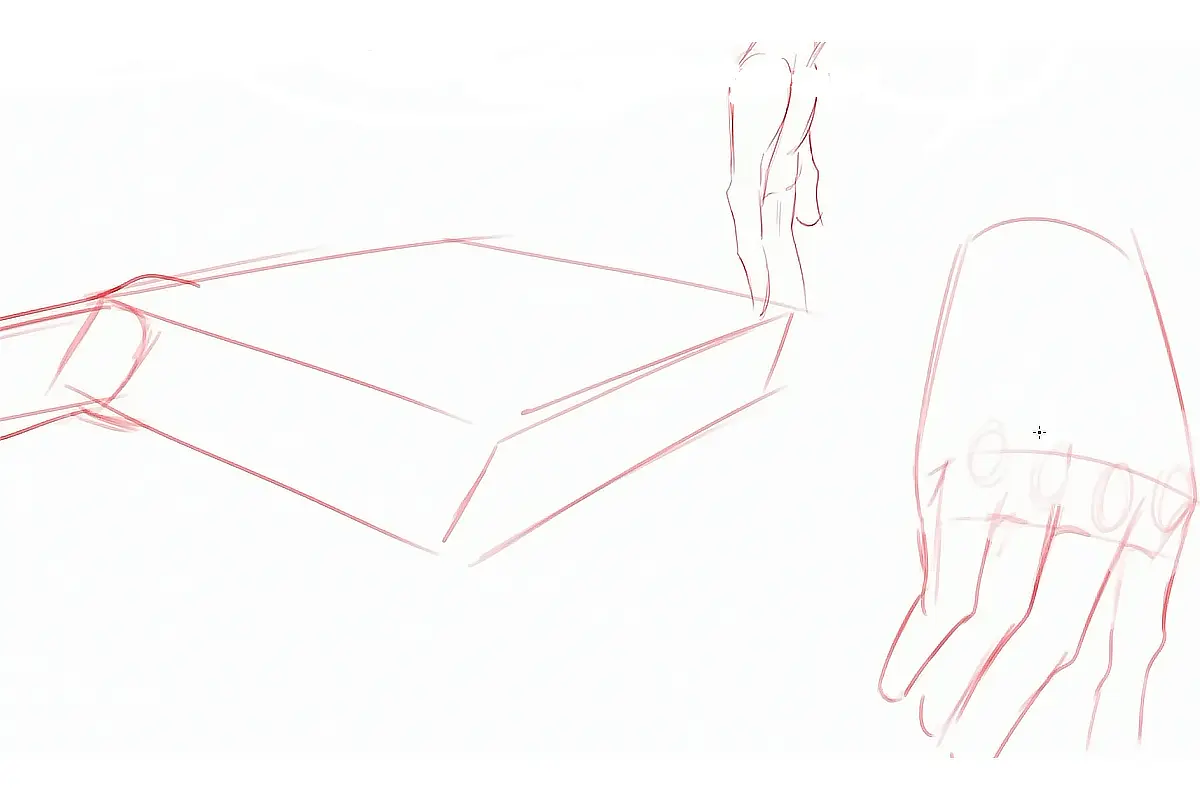
Pro tip:
This technique is key for drawing relaxed hands, hands hanging down, or any pose where the fingers aren’t perfectly straight.
Why These Techniques Work
They help you see the hand as a collection of simple, 3D forms—not just lines or outlines.
They keep your drawings expressive and dynamic, not stiff or lifeless.
They make it easier to draw hands from imagination or unusual angles, not just from reference.
If you are just starting out learning how to draw hands then, check out How to Draw Hands for Complete Beginners: A Simple 4-Step Process.
Practice, Play, and Stay Creative!