How to draw Trees with a Pencil in 3 Easy Steps ✏️🌳🌿
Drawing, Environment, Organic
Drawing Trees in 3 Easy Steps
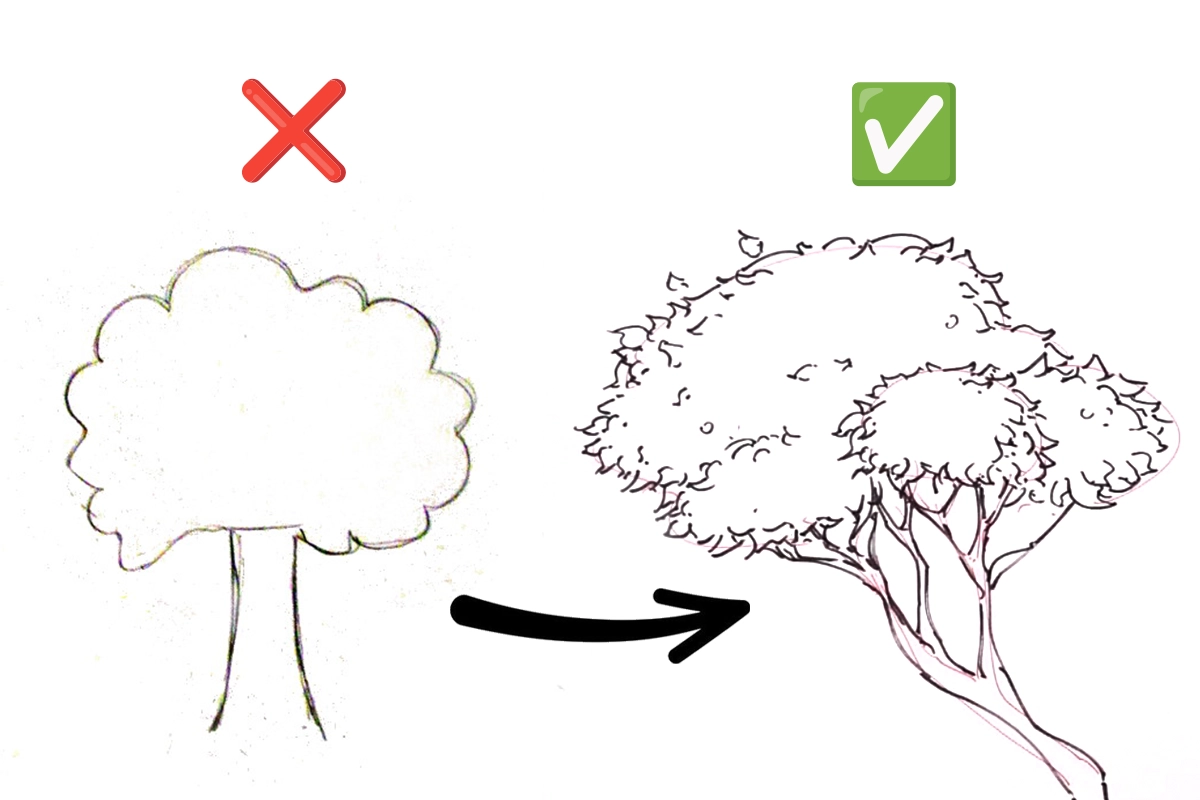
Drawing trees seems to baffle many beginners who start their drawing journey. They seem stuck drawing the graphic blobs for trees drawn as a kid...
Fear not! We're here to help.
Step 1: Start from Structure
As with any good drawing, we should start with the fundamentals...FORM!
And the easiest way to improve our tree drawings is by understanding the simple forms that make up these trees.
Tree Anatomy
A tree, generally, has 4 parts. From the ground up, these are:
- roots
- trunk
- branches
- canopy
The trick is to understand what simple forms make up these parts and how we can combine them together to form the illusion of a tree (remember, we're only creating illusions on paper, not actual trees!)
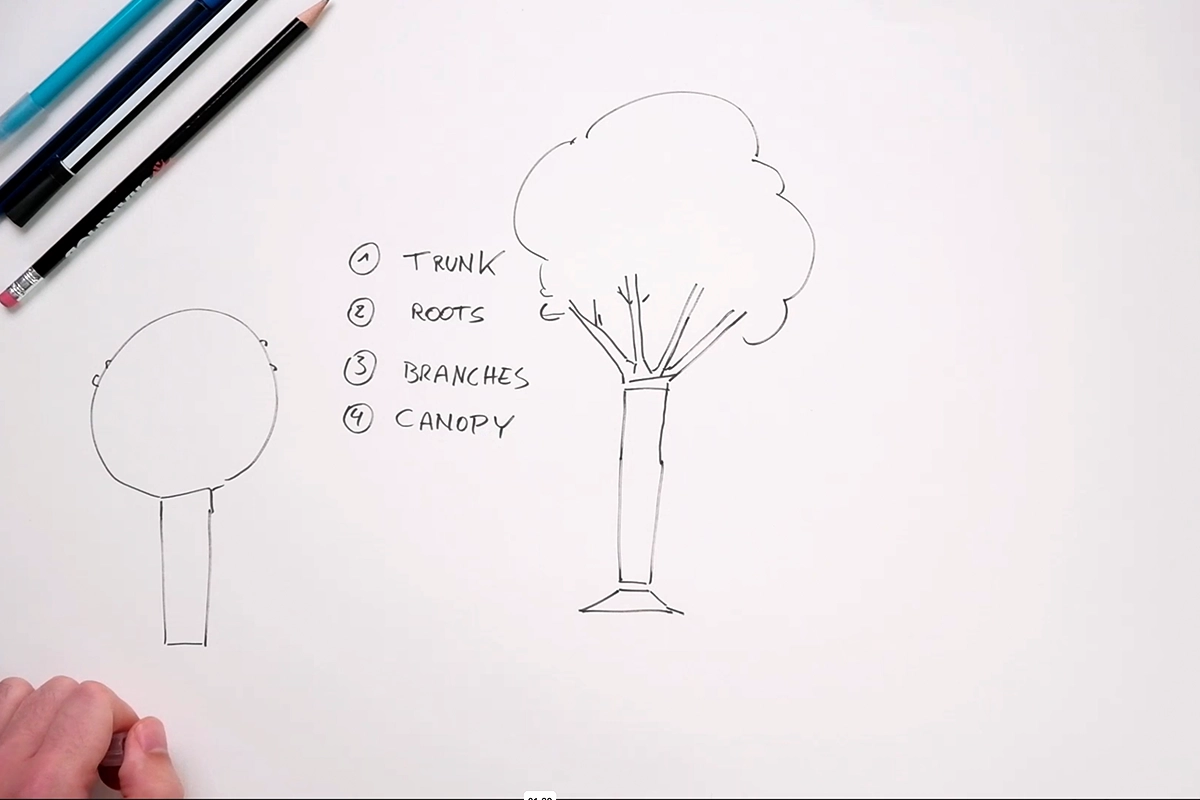
screenshot from Artwod Environment Roadmap
Trunk and Roots
The base of the tree consists of both the roots reaching into the ground and the trunk holding up the branches and canopy.
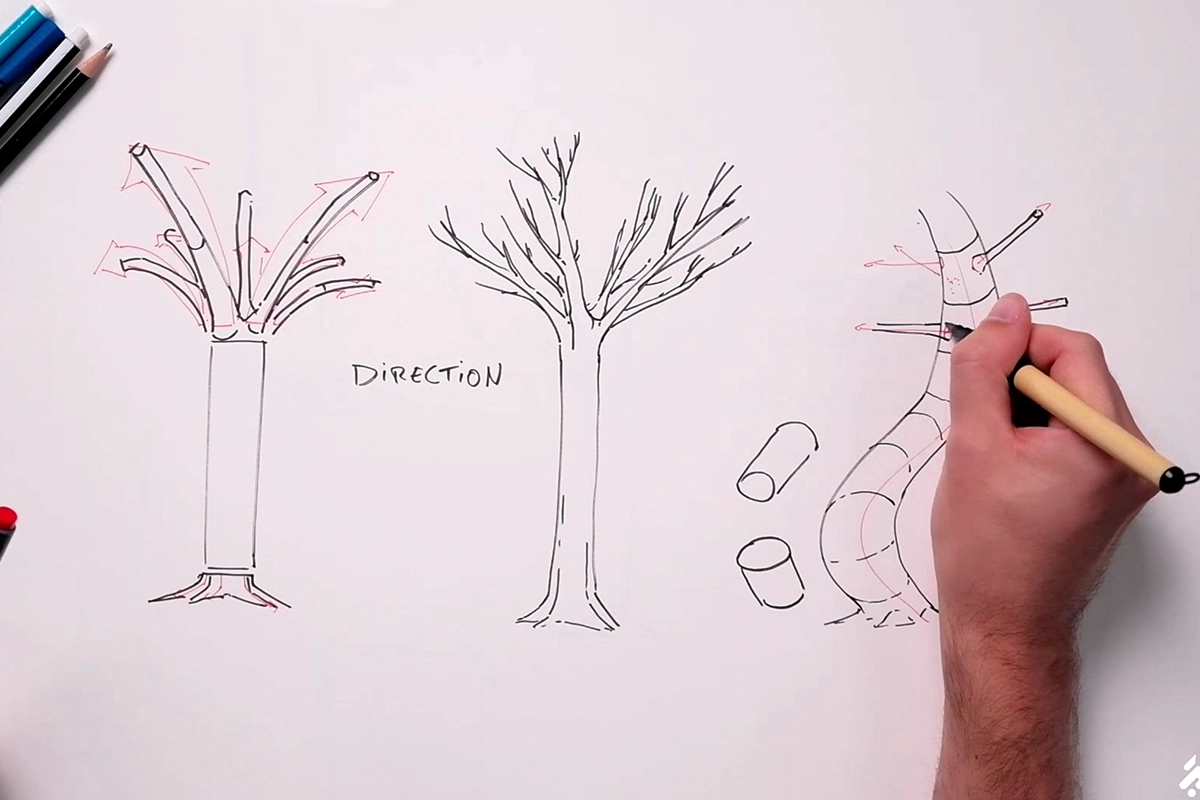
Both the trunk and roots can be simplified by using manipulated cylinders. These cylinders can be combined together (watch our beginner road to learn more about cylinders and from combination) to create a very convincing tree trunk.
It is important to understand that we can project the cylinders upward from the ground plane so that we always keep the tree grounded and attached to its roots.
A mistake many beginners make is drawing a tree trunk that goes straight down into the ground without any roots showing, this immediately looks off for the viewer.
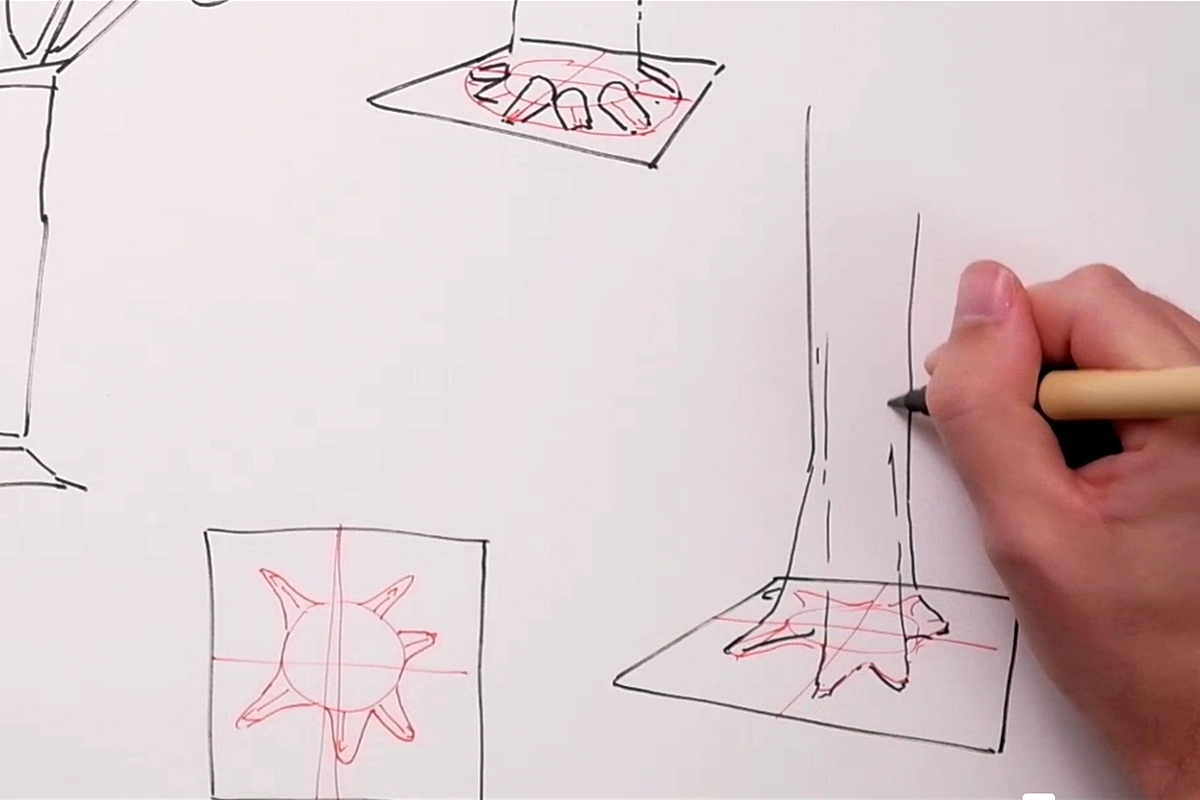
screenshot from Artwod Environment Roadmap
Step 2: Branches
Once we understand the simple forms that make up the trunk and roots, we can now move into the branches.
To better understand the flow of branches we've made a visual representation of how branches move outward from the base trunk.
Note that these branches flow in ALL directions in 3D space. Where many beginners will just draw graphic branches in 2D space, an experience artist will include overlap and depth to add believability and form the the tree.
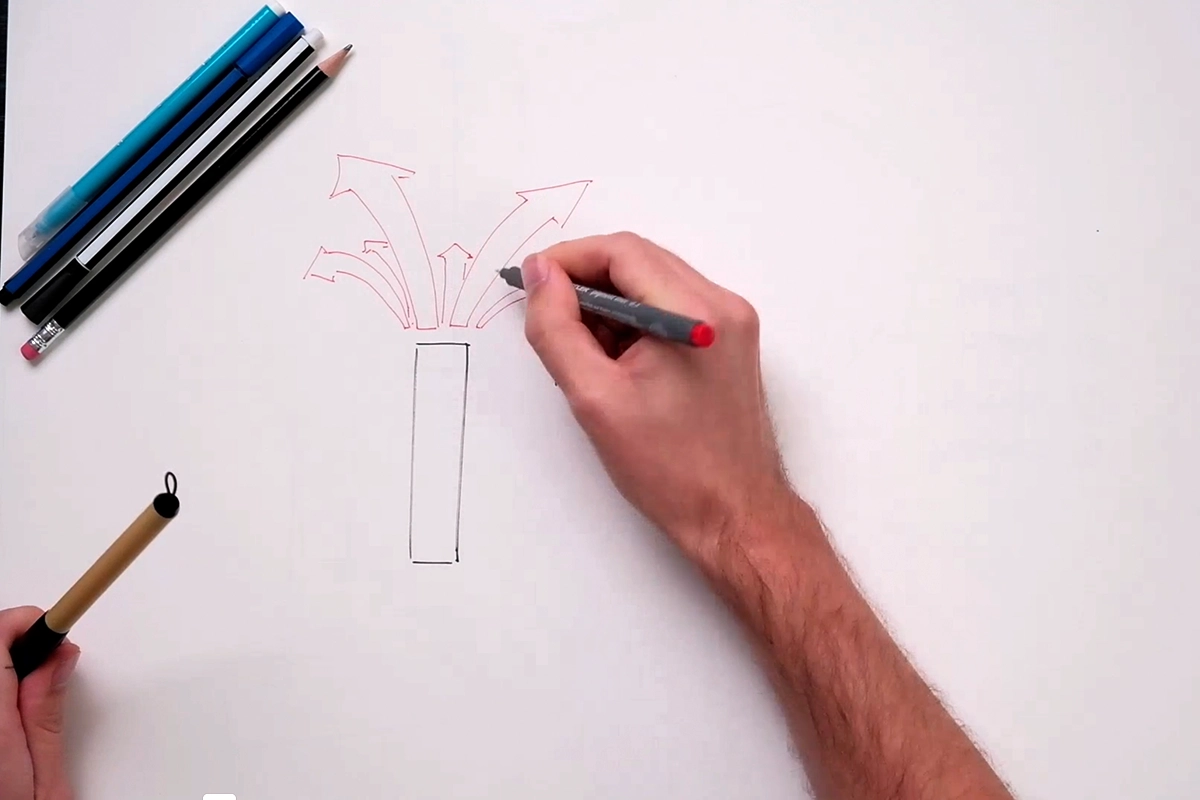
Illustrating how branches flow in 3 dimensional space.
Playing with flow
Once flow is well understood and we can confidently draw simple form in space, we can create more interest to the tree by manipulating the form of the trunk itself to be more dynamic and visually appealing.
Step 3: Canopy
Alright, we're almost there!
We've got our roots, trunk and branches. Now all that's left is to add the canopy.
While seemingly the most complex form, we can again rely on simplification of form to create a base to start from.
You must learn to see a simplified version of everything around you. Once you can you will have a much easier time placing objects in perspective.
The same is true for the canopy of a tree.
A pine tree can become a simple cone, an oak tree's canopy could be seen as a set of half sphere grouped together and so forth.
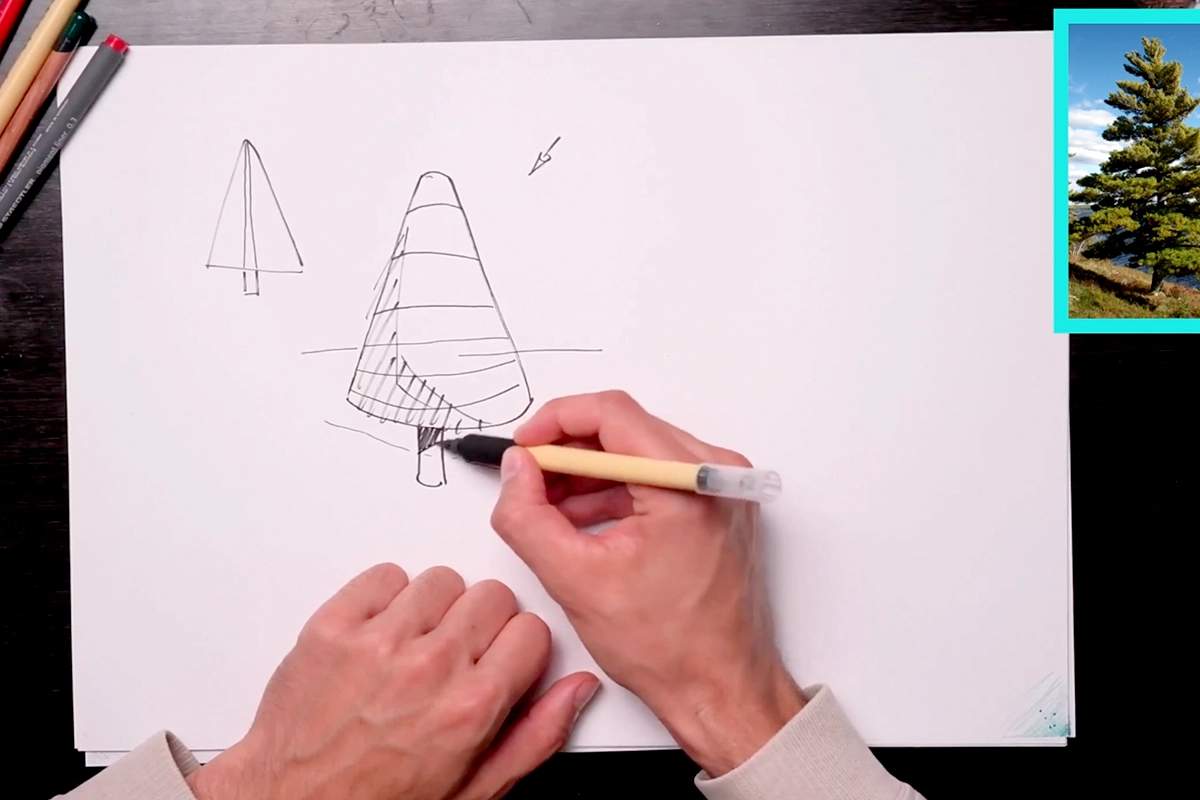
Screenshot from section 1 of the Artwod environment road.
After establishing our base form, it's time to add some texture.
Adding texture can be an entire post in and of itself, so we won't dive into details here.
We would recommend you check out the videos we made in our Beginner Environment Road.
Start by adding texture at the edges of the form so that the illusion of foliage becomes easy to read and understand.
Afterwards you can continue to suggest some texture inside of the main shape to add more detail and a finished look.
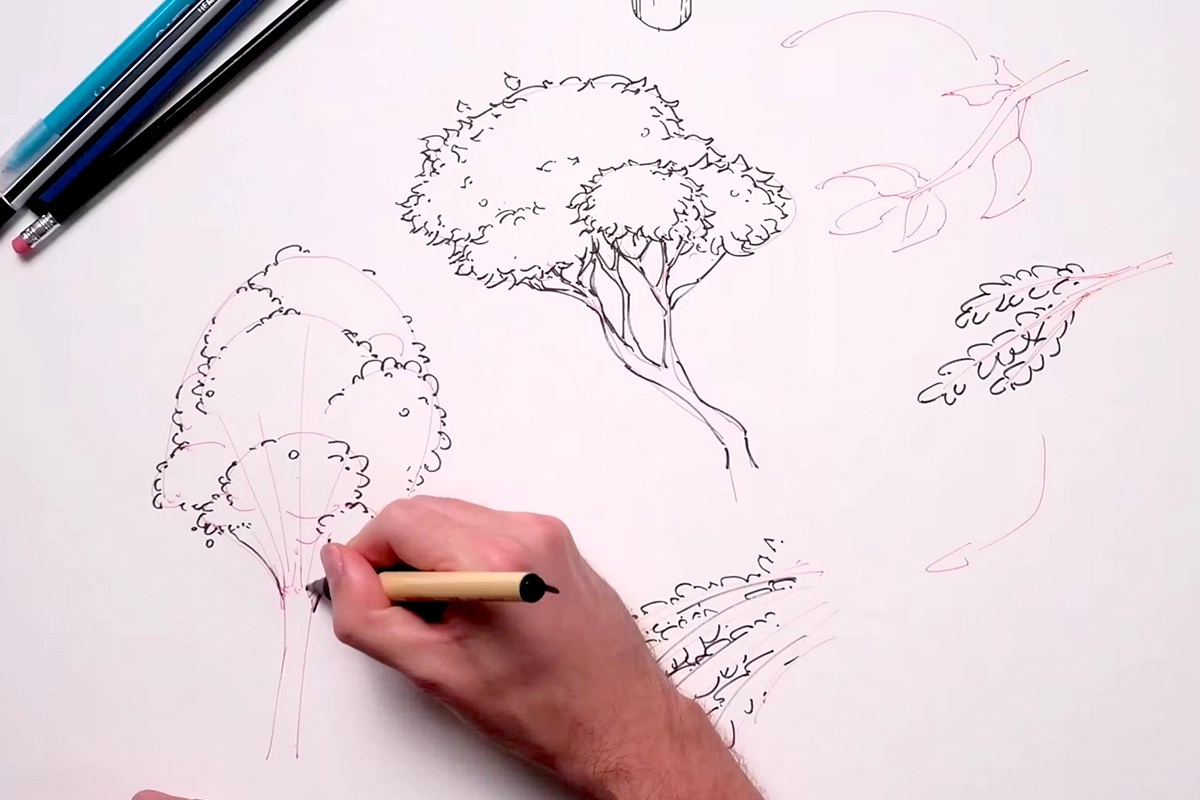
Screenshot from Artwod Environment Road
And there you go, drawing cool trees in 3 easy steps.
Remember to keep practicing all steps to gain confidence in your drawing skills.
Happy drawing!
Author: Arne B.
Published: Jan 24, 2025


