How to Draw Stylised Boats: Illustration and Concept Design Guide
How to Draw a Stylised Boat: Illustration, Design, and Drawing From Imagination
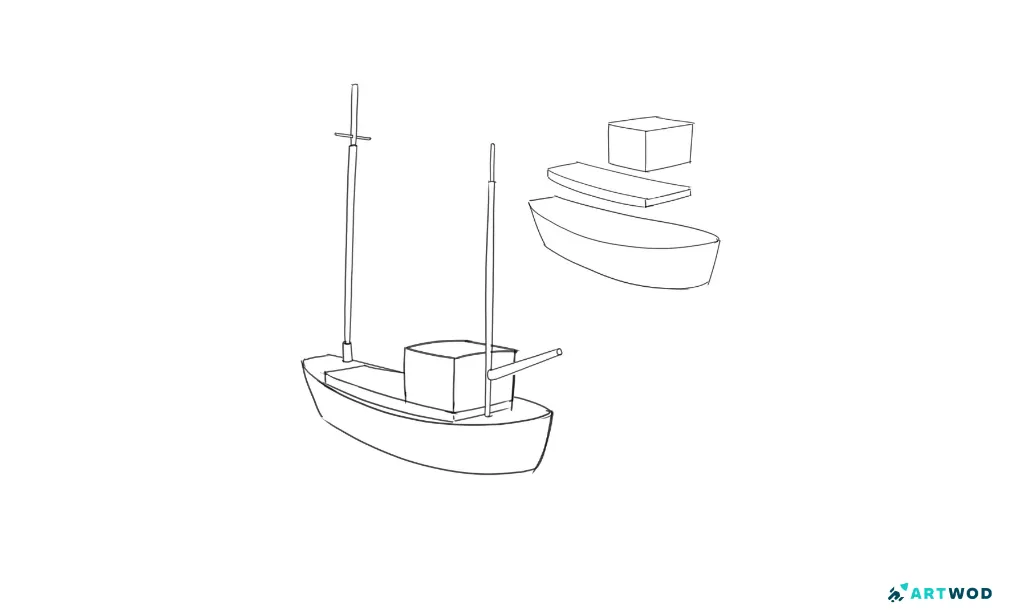
Step 1: Start With Half Cylinders and Boxes
Every boat, no matter how fantastical, starts with a hull. And the hull is just a half cylinder.
Draw three half cylinders. Now place a box on top of each one. That's your boat in its most basic form - a floating base with a structure sitting on it. Sci-fi cruiser, fantasy galleon, river barge - they all start here. Getting comfortable with this combination in different orientations prepares you for every perspective challenge that comes later.

Drawing a boat: simple forms base. Half cylinders with boxes on top.
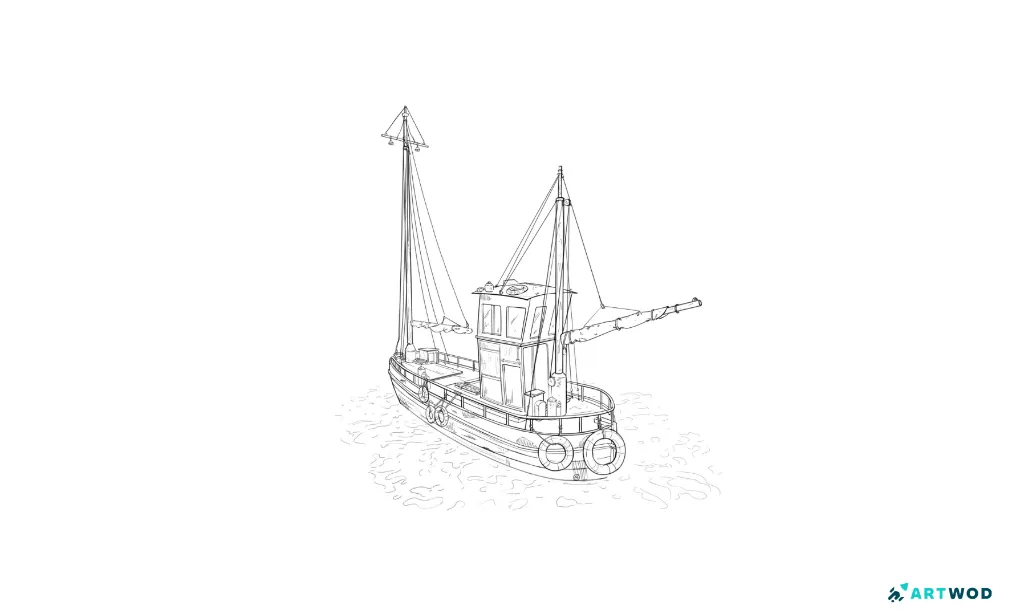
Step 2: Study a Real Boat From Reference
Before you design anything, you need to know how boats actually work. Find a reference - a fishing boat, a sailboat, a cargo ship - and draw it carefully.
Pay attention to where weight sits, how the hull meets the waterline, where structures are placed and why. If your striving for fantasy or sci-fi designs, they also borrow heavily from real-world logic. The more you understand the original, the more convincingly you can break its rules.
Step 2, drawing a boat, digital 2d pen sketch, boat simple forms breakdown
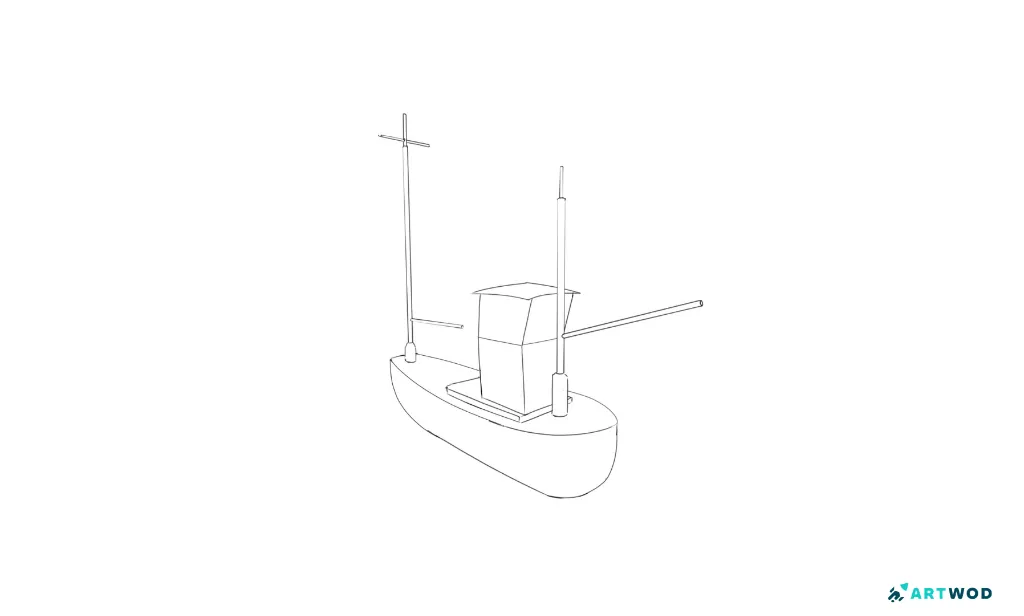
Step 3: Redraw the Same Boat in a Different Perspective
Now take your studied boat and redraw it from a completely different angle.
This is where your half cylinder and box foundation pays off. You're not copying anymore - you're constructing. If the forms feel solid in step one, the perspective shift becomes a spatial problem, not a guessing game. If you struggle with this, try drawing a box first and then place your boat inside it.
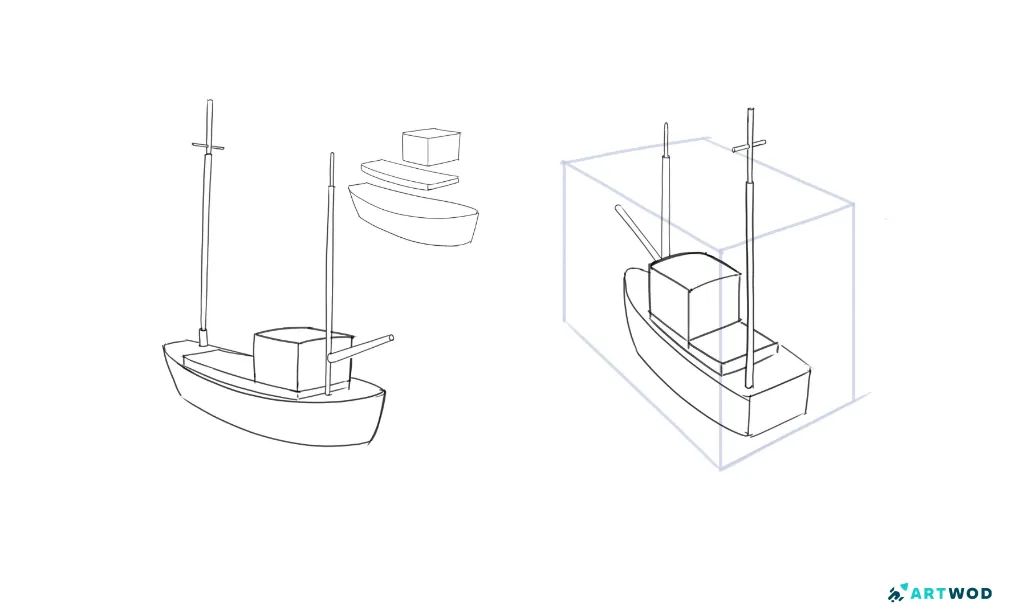
Drawing a boat: 2 boats in different angle, 1 boat simple forms breakdown.
Step 4: Study a Boat Drawing From an Artist You Admire
Reference photos teach you how boats work. Artist studies teach you how to make them interesting.
Find a boat illustration or concept design from an artist whose work you like - fantasy illustration, anime, concept art, whatever pulls you in. Now study it closely. Look at how they simplified the forms, where they added detail and where they held back, how they handled silhouette and proportion.
Pay attention to big, medium and small shapes and how the artist combines them to make the design interesting and harmonic. This step is about borrowing problem-solving strategies, not copying style.
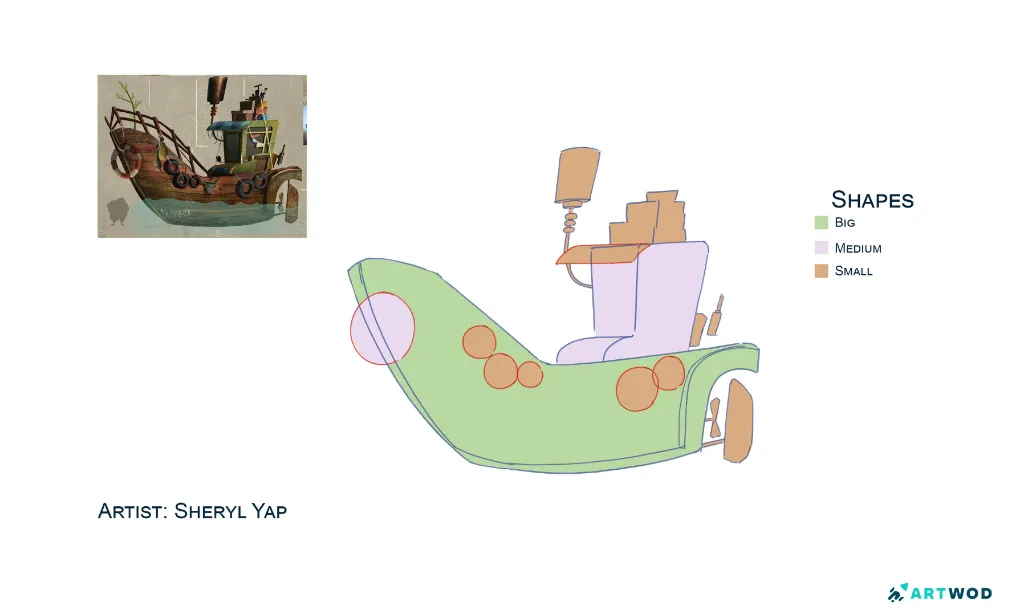
Drawing a boat: Sheryl Yap Study, big medium small shapes breakdown.
Step 5: Design Your Own Boat From Simple Forms
Now you build something. Start with your half cylinder hull, place your box structures on top, and begin pushing the shapes into something that belongs in your world.
If you're going for otherworldly look: sci-fi boats tend toward sharp angles, asymmetry, and industrial detail. Fantasy boats lean into organic curves, layered textures, and exaggerated proportions. Neither rule is fixed - the point is to make deliberate choices that serve the world you're building.
Keep this stage loose. You're designing, not rendering. Silhouette is everything at this point.
Boat design sketch, simple forms black pen 2d digital drawing
Step 6: Add Detail
Detail is the last thing that goes on, and it should earn its place.
Start with the areas that read first - the bow, the main structure, any focal point you want the eye to land on. Then work outward. Texture, mechanical elements, wear and damage, decorative features - all of it should reinforce what the boat is and where it's from.
Resist the urge to detail everything equally. Busy everywhere is the same as boring everywhere. Let some areas breathe.
Drawing a boat: black pen 2d digital detailed sketch, boat on the water, water texture.
The roadmap is straightforward: forms first, understanding second, imagination third. Every step builds on the last, and by the time you reach step six you're not copying anyone - you're designing.
If you want to know whether your concept is landing, upload your WIP to the Artwod Feedback Tool and get real critique from your peers - written, visual, or both. That's how you close the gap between what you see in your head and what ends up on the page.
Related Posts