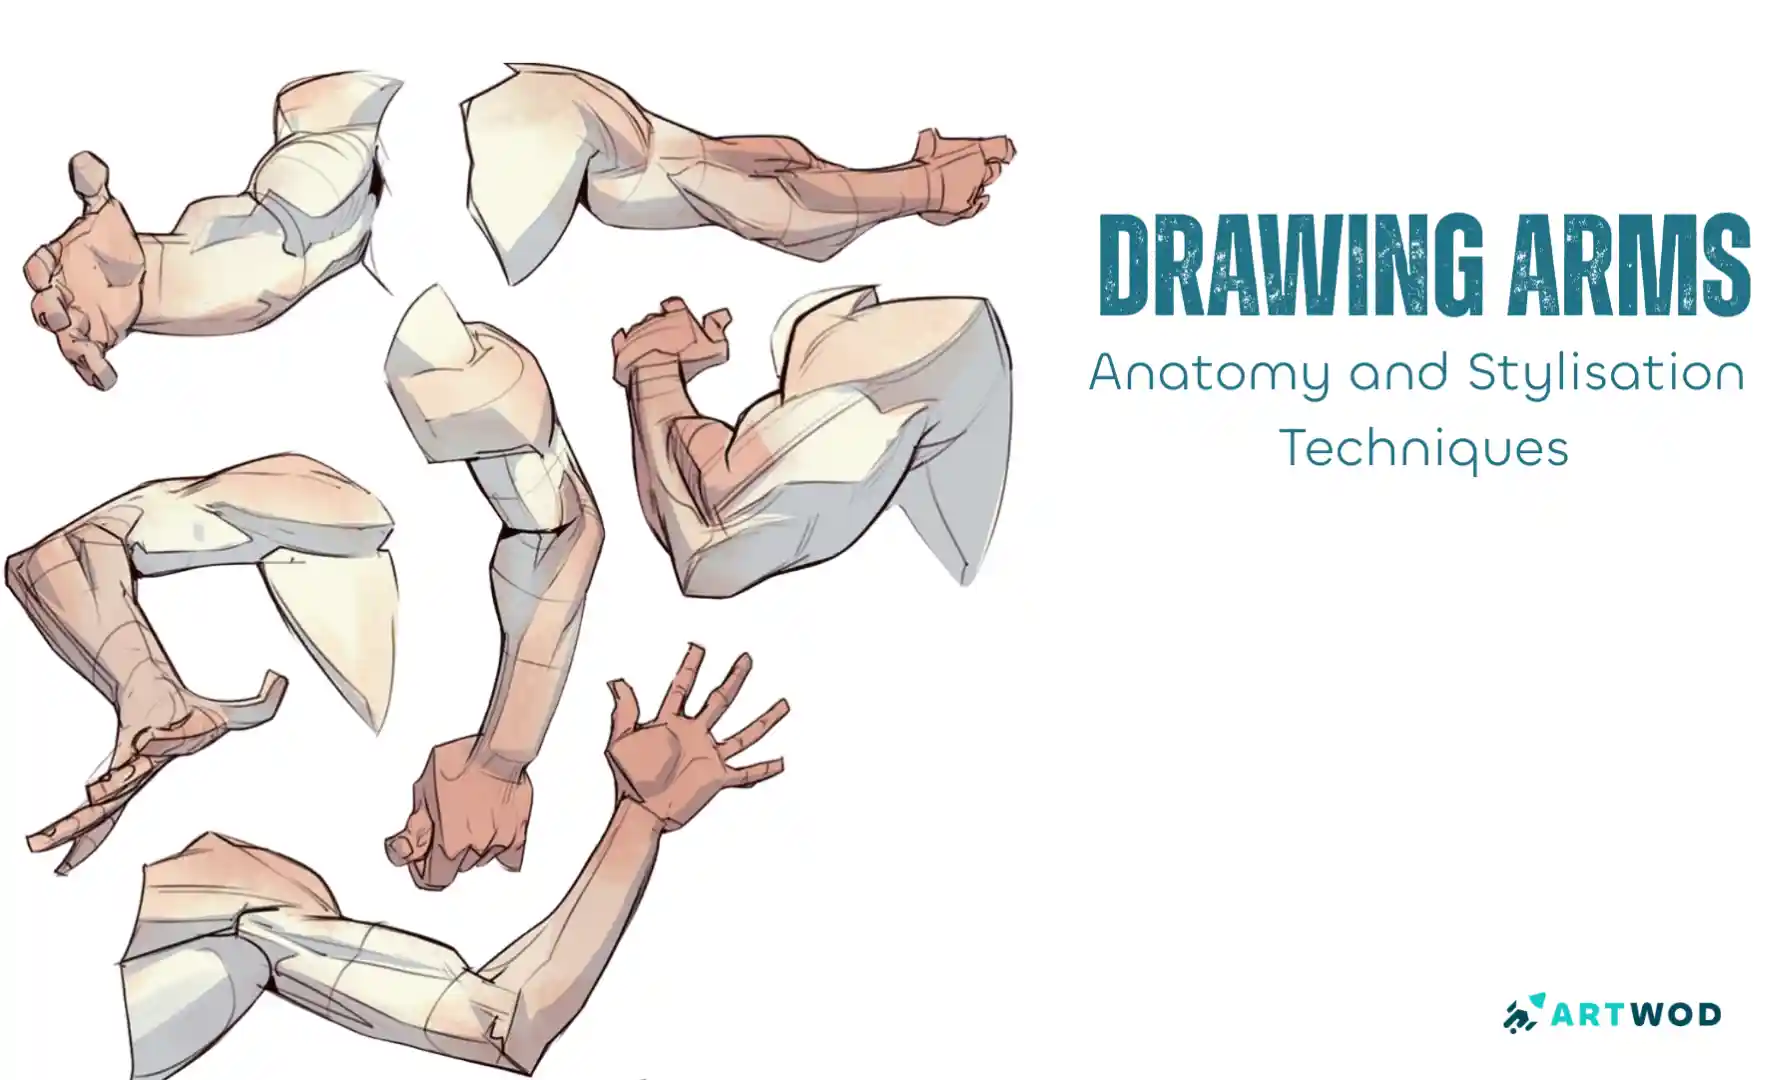
How to Draw Arms: Anatomy and Stylised Figure Drawing Tips
Drawing Arms: Anatomy and Stylisation Techniques
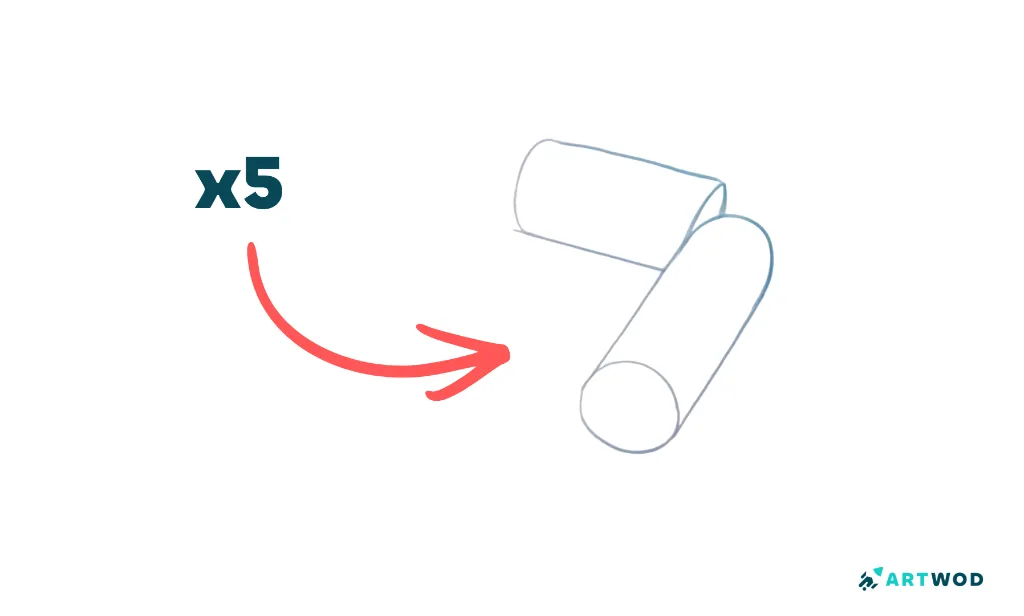
Step 1: Draw overlapping cylinders
How the cylinders overlap
The angle between them
The sense of depth created by overlap
Keep the drawings simple and loose. This step is about understanding structure and movement, no anatomy yet!
Step 1: Drawing Arms: Anatomy and Stylisation Techniques
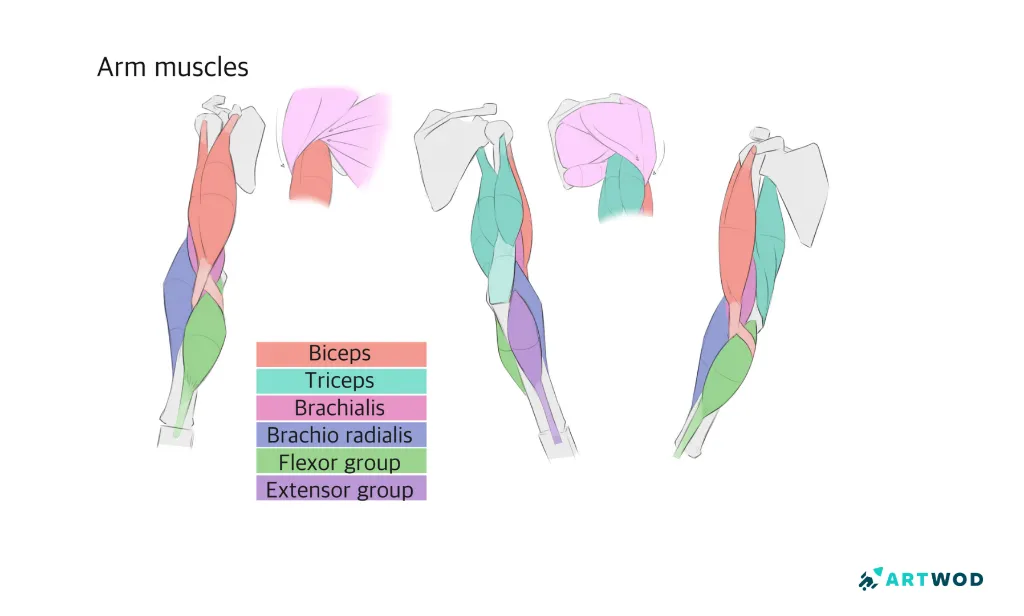
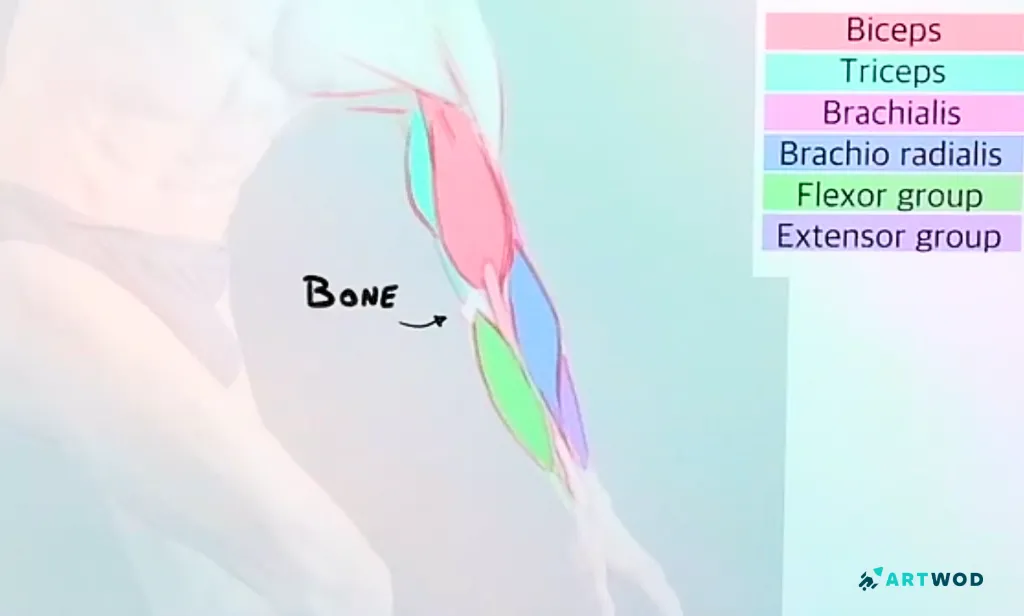
Step 2: Study the anatomy of the arm
Now it’s time to study the anatomy of the upper and lower arm. Look at the major muscle groups rather than every small detail.
Pay attention to:
How the biceps and triceps wrap around the upper arm
How the forearm muscles flow toward the wrist
Where muscles overlap and change direction
Understanding this will help you place details correctly later.
Step 2: Drawing Arms: Anatomy and Stylisation Techniques
Step 3: Trace muscles from photo references
Using real photo references, trace the muscles on top of three different arms. As you trace, indicate the names of the muscles that you see.
This step trains your eye to connect anatomy knowledge with simple manipulated forms. Don’t rush it - accuracy matters more than speed here.
Step 3: Drawing Arms: Anatomy and Stylisation Techniques
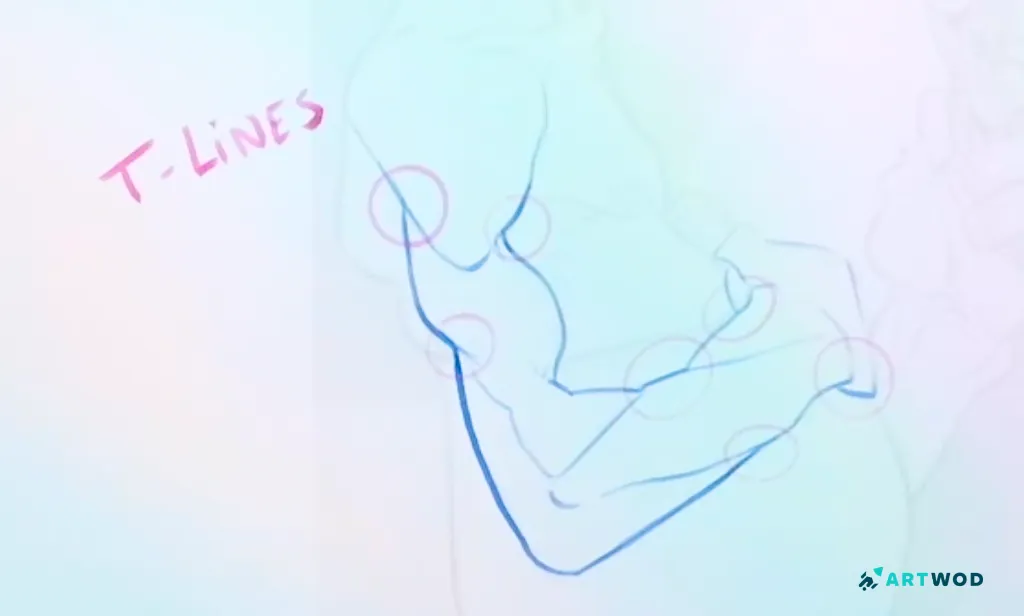
Step 4: Study artist arm drawings
Choose an artist (or several!) whose arm drawings you admire and trace three of their arm studies.
Focus on:
The curves of the forms
Where shapes overlap
How the artist uses T-lines to communicate form and structure
This step shows you how anatomy is simplified and stylized in professional artwork.
Step 4: Drawing Arms: Anatomy and Stylisation Techniques
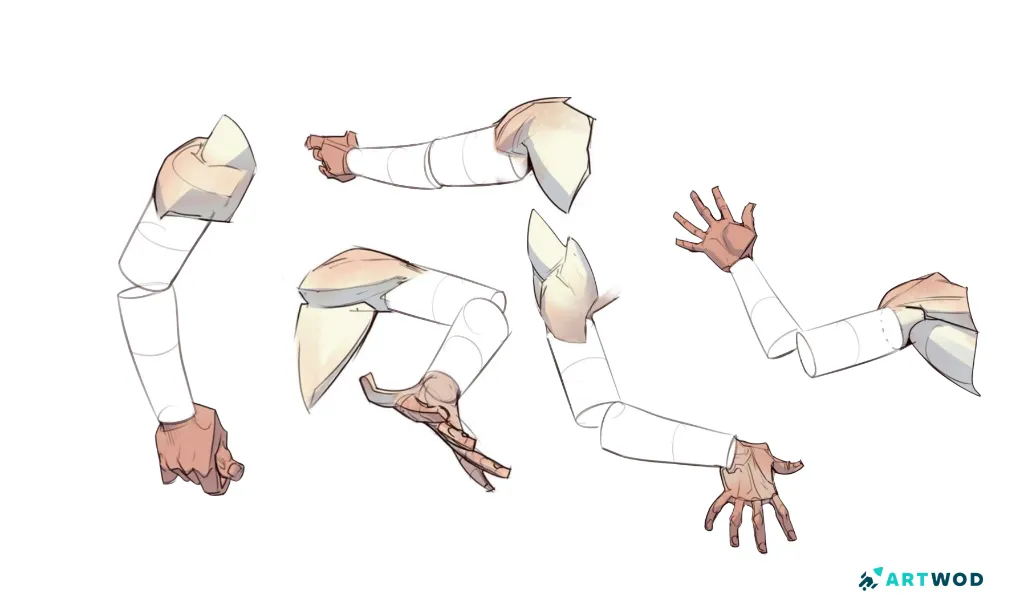
Step 5: Refine cylinders into a finished arm
Using the provided references, refine the initial cylinder structures into a detailed arm drawing.
Start by adjusting proportions, then layer anatomy on top. Keep checking that the underlying structure still makes sense as you add detail.
Step 5: Drawing Arms: Anatomy and Stylisation Techniques
Bonus step: Render the arms
Render two arms by adding local color and values. Try working with two different skin tones to better understand color variation and light behavior.
Focus on clarity rather than heavy rendering. Let the structure guide where values and color changes happen.
Arms become much easier to draw when you approach them structurally first, then layer anatomy and detail on top.
Repeat this process often, using different references and poses.Progress comes from understanding how forms work together, not from memorizing details.
If you try this exercise, share your results with us on Instagram and Discord — we love seeing artists improve and build confidence in their figure drawing skills.
Related Posts